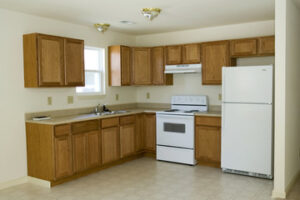
Refacing cabinets involves replacing cabinet doors and drawer fronts while keeping the existing cabinet box and framing materials intact. This approach is considered environmentally sustainable because it avoids waste and conserves wood resources.
Note that refinishing is only an option for cabinets that are made of solid wood or MDF, as paint will not adhere to thermofoil or laminate. If your cabinets are old, worn, or mismatched, refinishing may be an ideal solution for you. For professional help, contact Cabinet Refinishing Sacramento.
Staining cabinets is an economical way to give them a fresh new look and to restore the beauty of natural wood. It’s a very doable project for DIYers that doesn’t require extensive knowledge of woodworking or specialized tools. However, it is important to understand that the success of a staining project hinges on thorough prep work before beginning.
First, decide on the color you want your cabinets to be. Then, choose a stain to match it. A light finish can brighten and open a space and make it feel bigger while darker finishes create a cozy, warm feeling. Once you’ve selected the stain, be sure to read the application instructions carefully and to apply several coats to get the desired color. After the last coat dries, brush on a polyurethane sealer to protect the finish from water damage and other household hazards.
To stain cabinet doors, start by removing all the hardware from the cabinet door and drawer fronts, such as knobs, handles, and pulls. Then, unscrew the hinges from the cabinet doors and set them aside. If you’re able to do so without damaging the drawer fronts, remove them as well. Be sure to place all of the hardware in a safe place so you don’t lose it.
Once you’ve removed all the cabinet doors and drawer fronts, wipe down the surfaces with a damp cloth to remove any dust or dirt. Then, prepare the surface for staining by scrubbing it with a 50:50 mix of denatured alcohol and water using a Scotch Brite pad. Then lightly sand the surface with fine-grade (220-320) foam sanding pads or 400-grit sandpaper. Ensure that you’re working in a well-ventilated area and wear a respirator mask to protect yourself from any fumes.
Once you’ve sanded the cabinet surfaces, apply your chosen stain and let it dry for two to four hours. After the stain is dry, reinstall the cabinet doors and drawer fronts. If necessary, add additional coats of stain to reach the desired color and allow each coat to dry for at least six hours before applying a second coat.
Painting
When painting cabinets, it is very important that the surface of the cabinet be properly prepped. This includes scuffing the surface to help the paint adhere properly. It is also a good idea to use a high-quality primer. Primers are designed to bond very strongly both mechanically and chemically to the surfaces they are applied to, which can help to prevent a lot of problems with future coats of paint.
It is also a good idea to paint in a well-ventilated area. Lastly, it is recommended that the cabinets be painted in small sections at a time to avoid any drips or runs. When the cabinets are finished, it is a good idea to let them dry for a day or two before reinstalling them in your kitchen.
While many people do choose to paint their own cabinets, it is a task that is not as simple as it looks. There are a lot of things that can go wrong, especially for someone who has never done it before. That is why it is usually best to leave it to a professional. They can make sure the job is done correctly and that it is completed in a timely manner.
If you are hiring a company to do your cabinet painting, ask them what their process is. Some companies will remove all of the cabinet doors and drawers and take them to a separate space where they can be worked on without worrying about messing up any other areas of your home. This is a much better option that just painting over them.
A good quality painting company will also protect any other surfaces in your home that may be affected by the work they are doing. This can be accomplished by using painter’s tape to mask off any areas that are not getting paint. They will then cover those areas with either brown builder’s paper or a high-density plastic drop cloth. This will prevent any accidental splashes of paint on your countertops or walls.
It is a good idea to use a foam sanding block to lightly scuff the cabinets before applying the primer. This will help the primer adhere to the surface and will also provide a smooth finish for the final coat of paint. After sanding, the cabinets should be vacuumed and then wiped down to remove any dust or residue from the sanding process.
Polishing
Cabinet refinishing is an excellent way to update your kitchen and breathe new life into old cabinets without the cost and hassle of a complete remodel. The best part is that it’s an eco-friendly option as well, reducing the amount of waste that goes into landfills. The first step is to clean your cabinets thoroughly with a mild detergent or a solution of two parts water to one part dish soap. This will remove any dirt, grease or grime that may have accumulated over time. Once your cabinets are dry, they’re ready for sanding. It’s important to use a fine-grit sandpaper to smooth out any rough spots on your cabinets, such as dents, grooves or scratches. This will also help your paint job to look its best.
Once your cabinets are sanded and cleaned, it’s time to start the painting process. A quality painter will mask off any surfaces that you don’t want to get paint on, such as appliances or walls. They’ll also use a fine-grain wood filler to repair any cracks or holes in your cabinetry before applying the first coat of paint. This step will ensure that the next coat of paint bonds properly with your cabinets.
After the first coat of paint is applied, you’ll need to wait for it to dry completely before using your cabinets. You’ll also want to sand between coats to ensure that the finish is as smooth as possible. When you’re finished, your cabinets will look brand-new and will be the focal point of your kitchen.
Although you can polish your cabinets yourself, it’s often easier to hire a professional. They’ll know how to work with different kinds of paints and will be able to achieve the look that you’re going for. They’ll also have the right equipment to do a thorough job. They’ll also use a soft microfiber cloth to avoid any scratching that could damage your cabinet surface. In addition, they’ll be able to choose a natural polish that will nourish the wood while keeping it looking shiny. One popular choice is beeswax, but there are a number of other options as well.
Sealing
While staining cabinets and painting them are great ways to give them a fresh new look, unless you take steps to protect your investment by sealing your newly painted cabinetry, they will likely begin to fade and deteriorate over time. Properly sealing your cabinets with a high-quality top coat of polyurethane, polycrylic, spar urethane or nitrocellulose will extend the life of your paint job by creating a durable, plastic-like layer that shields your cabinets from moisture and ultraviolet light.
While this step can be tedious, it is critical to ensure that your paint job lasts as long as possible. The best way to do this is to use a brush or a sprayer and apply a couple of thin coats of sealer, allowing each one to dry thoroughly before applying the next. It is important to use a sealer that is designed for kitchen cabinets, as this will help create an extra strong bond with your existing topcoat of paint.
To start, you will need to lightly sand your cabinet doors, drawer fronts and casings with a medium-grit sandpaper, like 180-grit, to smooth any rough spots. This will also help to make sure that your new primer and paint will adhere well to the surface. Once the sanding is complete, you will need to wipe away all of the dust particles with a damp cloth and then use an appropriate primer.
After the primer has dried, you can proceed to add color layers with your chosen cabinet paint. It is important to make sure that you use a kitchen cabinet-specific primer, as these products will contain additives that help block out moisture and provide an extra strength bond with your finish.
If you are not comfortable completing this project on your own, there are several home improvement and interior design companies that specialize in cabinet refacing and can perform the work for a fraction of the cost. In either case, whether you choose to reface or paint your cabinets, the results will be dramatic and can completely transform the look of your kitchen.